
Purpose
Use the Templates page to configure client-specific visual templates for Product and Customer output. The page lets you build the printable or label-style layout by adding areas to a canvas and defining what each area shows, how it is styled and how it is positioned.
The template can include:
- Fixed text
- Product or customer fields
- Custom fields
- Native system fields
- Images
- Barcodes
- Price-related values
- Dates and other dynamic values
The template layout determines how the final generated output will look.
Roles involved
- System administrator
- Label / print administrator
- Implementation / support team
Preconditions
- You need permission to edit Client profile.
- You should know whether you are configuring the Product template or the Customer template.
- Before editing the layout, define which information should appear in the generated output.
- The expected output size should be known before creating the template layout.
- If the template should display attributes, custom fields, or native fields, those fields must already exist in the system.
- If the template should include images, the required image files should be prepared before setup.
- If the template should include barcodes, confirm which barcode format is required.
Navigation path
Client profile → Templates
Step-by-step procedure
- Open Client profile → Templates.
- Choose the template type at the top of the page:
- Product
- Customer
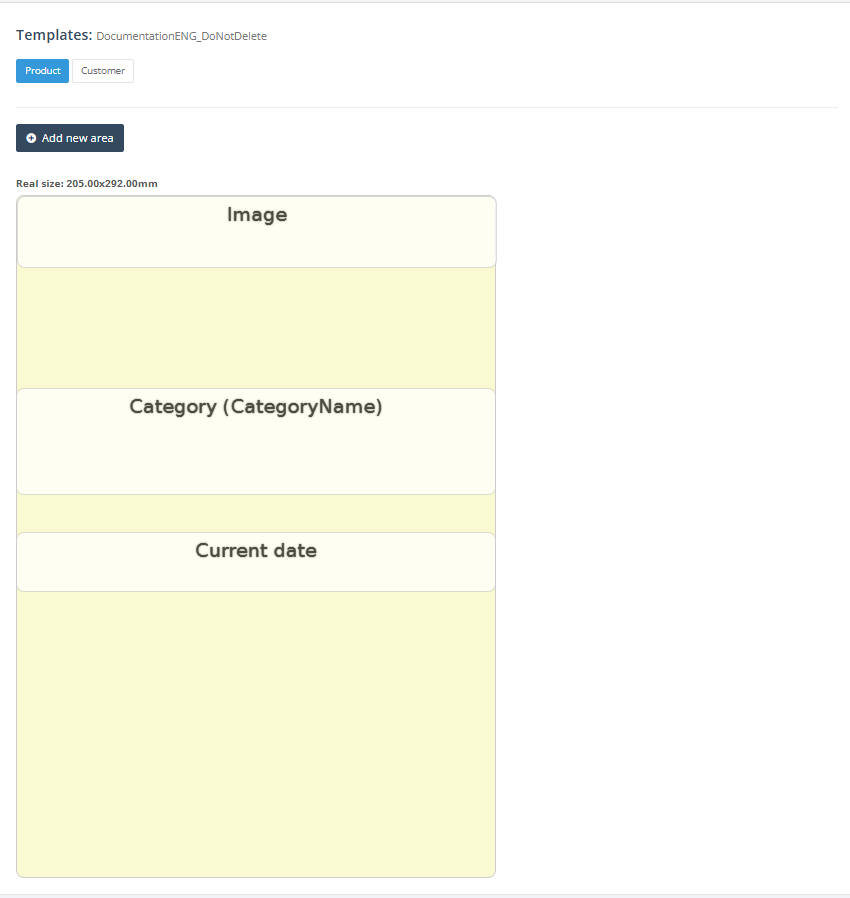
- Review the layout canvas shown on the left side of the page. If template dimensions are already configured, the page shows the Real size in millimeters.
- Click Add new area to create a new printable area.
- In the area editor window, define the visual styling of the area:
- Font
- Font size
- Font color
- Background color
- Bold
- Italic
- Text decoration
- Alignment
- Rotation (0°, 90°, 180°, 270°)
- Select the Area content value.
- The available options are loaded from the system and determine what kind of data the area will display.
- Depending on the selected content type, configure the related extra fields:
- Custom text when a fixed text area is used
- Barcode type
- Stretch
- Image upload
- Split price
- Attribute
- Prefix
- Native field
- Custom field
- If the area should display fixed text, enter the required text in the Custom text field.
- If the area should display a barcode, select the required barcode type
- Available barcode types may include:
- QR code
- EAN13 barcode
- GS1128 barcode
- Code128 barcode
- Available barcode types may include:
- If the area should display an image, upload the required image file.
- If the area should display an attribute, custom field, or native field, select the correct field from the available list.
- Use Prefix if additional text should be displayed before the selected value.
- Use the layout action buttons on each area to review or edit existing areas. Delete an area when it is no longer needed.
- Click Save to save the area positions on the template layout.
- Use Cancel to leave the page without saving layout changes.
Required fields
- Template type: Product or Customer
- Content value for each area
- Font
- Font size
Additional required fields depend on the selected content value.
Examples:
- Custom text is required when the area displays fixed text.
- Barcode type is required when the area displays a barcode.
- Image is required when the area displays an uploaded image.
- Attribute, custom field, or native field is required when the area displays system data.
- Prefix is optional and can be used to add text before the displayed value.
Validation rules
- Each area must have a valid Area content value.
- Font size should be numeric.
- If the content type requires a linked attribute or field, that selection must be made before saving the area.
- If the content type is barcode, the barcode type must be selected from the supported list.
- If the content type is image, a valid file must be uploaded.
- Area positions and sizes should fit within the visible canvas and the configured real size of the template.
Exceptions
- The available content options depend on the selected template type and on the system configuration.
- Custom field options appear only for fields marked as template-enabled.
- Attribute and native field lists differ between the Product and Customer template types.
- If the user does not have permission to edit retail labels, some controls in the area editor can appear disabled.
Common errors
- An area is created with the wrong content value.
- A required native field, custom field, or attribute is not selected.
- Text areas are too small, causing values to be cut off.
- Areas overlap and make the generated output difficult to read.
- The wrong barcode type is selected.
- Barcode areas are too small, causing scanning issues.
- An image is uploaded with incorrect size or proportions.
- Layout changes are made, but the final template is not saved.
- The wrong template type is edited, for example Product instead of Customer.
Troubleshooting
- If a field is blank in the generated output, check the selected Content value and linked field.
- If a custom field is not available, verify that the field exists and is enabled for template usage.
- If the barcode does not scan, check the barcode type, area size, and Stretch setting.
- If the layout looks incorrect, review the area positions and sizes on the canvas.
- If text overlaps, increase the area size or reduce the font size.
- If an image does not display correctly, check the uploaded file and area dimensions.
- If changes are not visible in the output, confirm that the template layout was saved.
- After major changes, generate a test output using a real Product or Customer record.
Questions / Gaps
- Confirm which output processes use the Product template.
- Confirm which output processes use the Customer template.
- Confirm the expected output size before creating or changing the layout.
- Confirm which fields should be included in the generated output.
- Confirm which barcode type should be used, if barcodes are required.
- Confirm whether custom fields or attributes must be created before configuring the template.
- Confirm whether the final output should be used for printing, PDF export, customer forms, product forms, or another output process.