Purpose
Use the Purchase Credit Orders module to record returns to vendors and issue credit notes. When you send goods back to a supplier, a purchase credit order captures the returned items, quantities and values, and adjusts stock levels upon approval. It acts as a formal document for vendor credits and ensures inventory and accounting records remain accurate.
Roles involved
The following roles typically work with purchase credit orders:
- Purchasing managers – authorise returns and approve credit notes.
- Procurement specialists/buyers – create credit note drafts and enter line details.
- Warehouse personnel – select the location from which goods are returned and prepare shipments.
- Accounts payable staff – review and reconcile credit amounts against vendor statements.
- Users must have “view Purchase credit orders” rights to access the list and “edit Purchase credit orders” rights to create, modify or approve documents.
Preconditions
- Vendor records must exist in the Vendors module.
- Products should be defined with valid VAT codes and units of measure.
- Locations, currencies and payment methods must be configured in Retail Setup.
- Users require appropriate permissions to create or edit purchase credit orders.
Navigation path
From the main menu select:
Purchase orders → Purchase credit orders
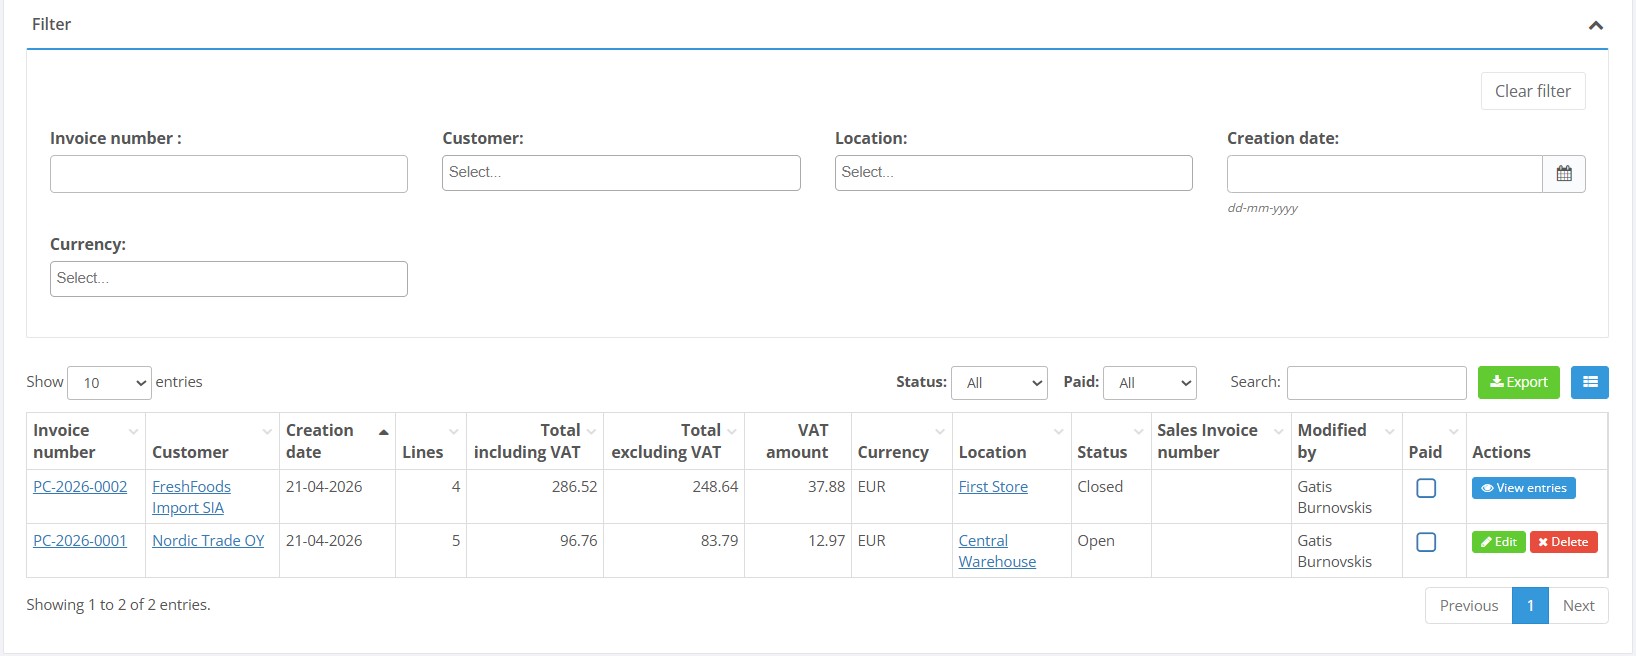
The list page displays existing credit notes with filters for status and paid flags. You can search, configure columns and export the list.
Step‑by‑step procedure
- Open the list – Navigate to Purchase credit orders. Use the search box and filters to find existing credit notes. Click the green Export button if you need a spreadsheet.
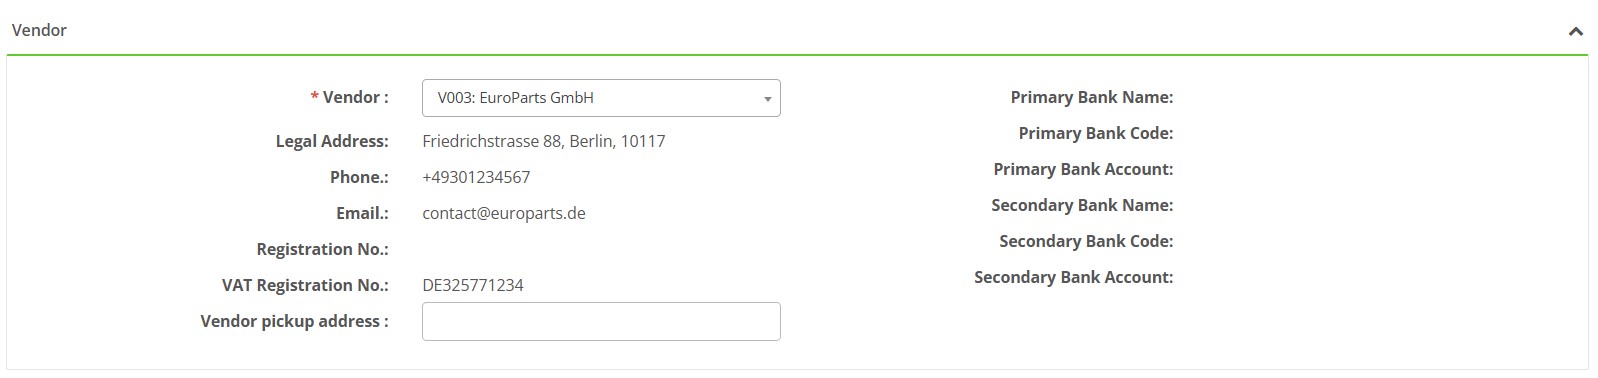
- Create a new credit note – Click Create new Purchase credit order. A form opens with an automatically generated credit note number. Select the Vendor (mandatory); vendor details such as address and bank information populate for reference:
-
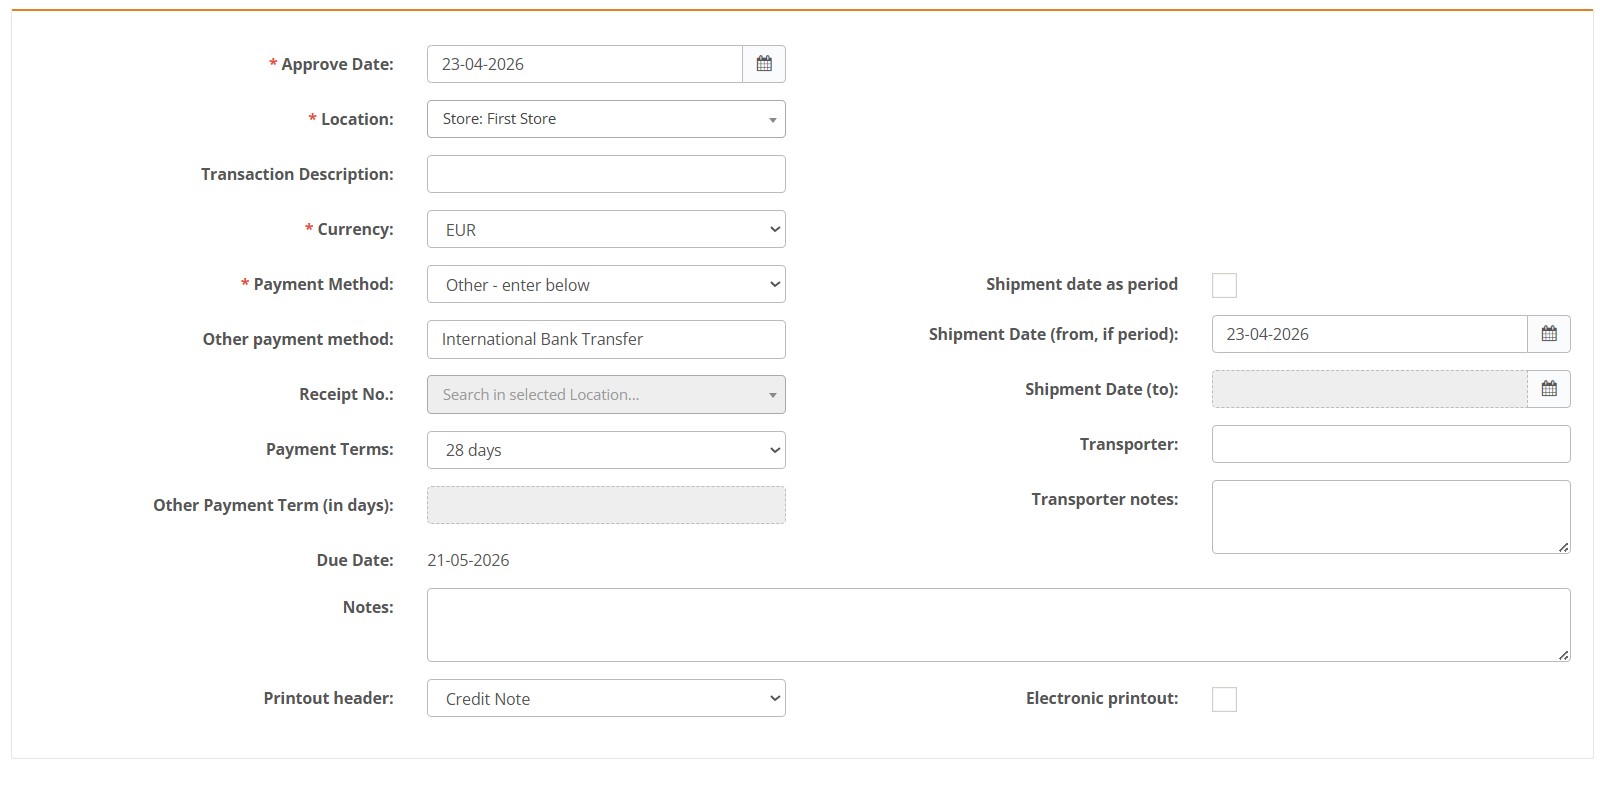
Enter header details – Complete the Details section:
- Approve date – mandatory; defaults to the current date. Determines when the return will affect stock.
- Location – mandatory; choose the warehouse/store that is returning goods.
- Currency – mandatory; typically EUR.
- Payment method – mandatory; select the method for settling the credit (e.g. bank transfer, cash). If you choose “Other – enter below,” complete the Other payment method field.
Optional fields include:
- Transaction description – Used to briefly explain the purpose of the transaction.
- Receipt No. – Provided if the credit order has already been paid; enter the receipt number used for the original payment.
- Payment terms – Define the number of days within which the payment must be made.
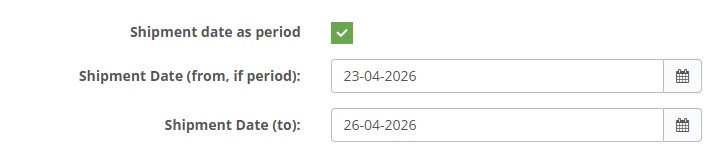
- Shipment dates (from/to),
- Transporter and Transporter notes.
-
Add credit note lines – A Credit Note lines table appears.
Click Add a new line to enter each returned product. Mandatory columns are:
- Product No. – select the product being returned; search or scan the product number/alias.
- Qty – quantity being returned. Enter a positive number; the system calculates the credit (negative value) automatically.
- Import or export lines – Use the Import / export dropdown to import multiple lines from an Excel or CSV template. At minimum, column A (Item No.) and column B (Quantity) are required. You can also export existing lines to a spreadsheet for analysis.
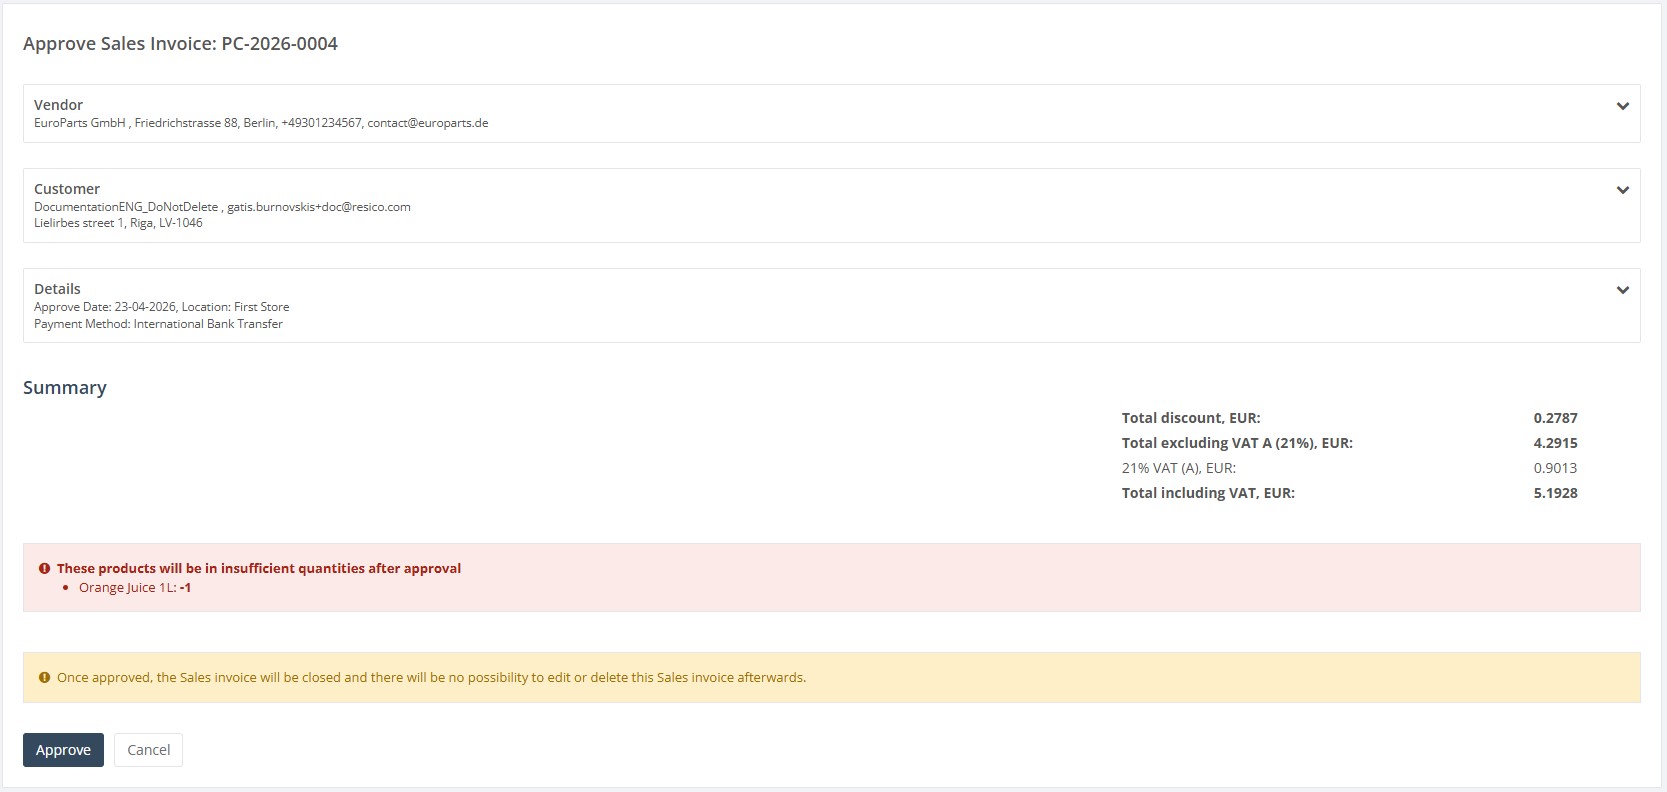
- Save and approve – Click Save to store the draft. Use Approve to finalise the credit note and adjust stock. After approval, the document becomes read‑only but can still be downloaded or printed.
- Mandatory fields are marked with a red asterisk; the system will not save or approve without them.
- Quantity values in lines must be positive; the system interprets them as returns and calculates negative amounts accordingly.
- Duplicate product numbers on different lines are allowed but will create separate lines. To return multiple quantities on one line, adjust the quantity accordingly.
- The credit note cannot be approved if required header fields or lines are missing.
- Negative stock warning – When returning goods you may see a warning if the quantity exceeds available stock. Users with the proper rights can approve the credit note even if it leads to negative stock.
- Other payment method – Selecting “Other – enter below” in Payment method reveals an additional input. Use this to describe non‑standard refund methods.
- Shipment dates – If goods were shipped over a period rather than on a single day, tick the “Shipment date as period” checkbox and enter “From” and “To” dates.
- “Please select a vendor/location/payment method” – one or more mandatory header fields are blank.
- Import file errors – occur when the import file does not match the expected template or contains unknown product numbers. Always use the provided template and ensure products exist in the system.
- Not enough stock – a warning displayed when returning more quantity than is available. Depending on user rights, you may still proceed.
- If lines cannot be added, make sure the header has been saved and all required fields are completed.
- If a product cannot be found, verify it exists in the Products module and is active.
- When import fails, use the downloadable template and ensure item numbers and quantities are numeric.
- If the Approve button is disabled, ensure at least one line exists and that your user account has rights to approve purchase credit orders.
Required fields
Vendor – The supplier to whom the credit note will be sent.
Approve date – The date when the credit note will impact stock levels and accounting records.
Location – The warehouse or store from which the goods are returned.
Currency – The currency used for the transaction (for example, EUR).
Payment method – The method used to refund or settle the credit with the vendor.
Product No. – The number or alias identifying the product being returned.
Qty – The quantity of each product being returned.
Validation rules
Exceptions
Common errors