Purpose
The Customers module maintains all information about your clients. It stores names, addresses and contact details, allows you to log CRM activities, attach documents, track transaction history, manage loyalty cards and define default invoice values. Accurate customer data improves order processing, billing accuracy and marketing activities.
Roles involved
Various people within your organisation will use the customer record:
- Sales representatives – add new customers, update addresses and default payment terms.
- Account managers – record CRM interactions, reminders and assign loyalty cards.
- Accounts receivable staff – verify registration numbers and track transaction history for invoicing.
- Marketing or loyalty programme managers – issue and manage loyalty cards.
- Users must have permissions such as “view Customers”, “create Customers”, “edit Customers” and “delete Customers”. Without edit rights, only viewing is allowed.
Preconditions
- Customer groups and numbering rules should be configured if codes are automatically assigned.
- Payment methods, payment terms, VAT groups and currencies should be defined so default values can be selected on the customer card.
- Employees maintaining customer data must know the company’s data privacy policies and have consent to store customer information.
Navigation path
To access customer records go to:
Customers
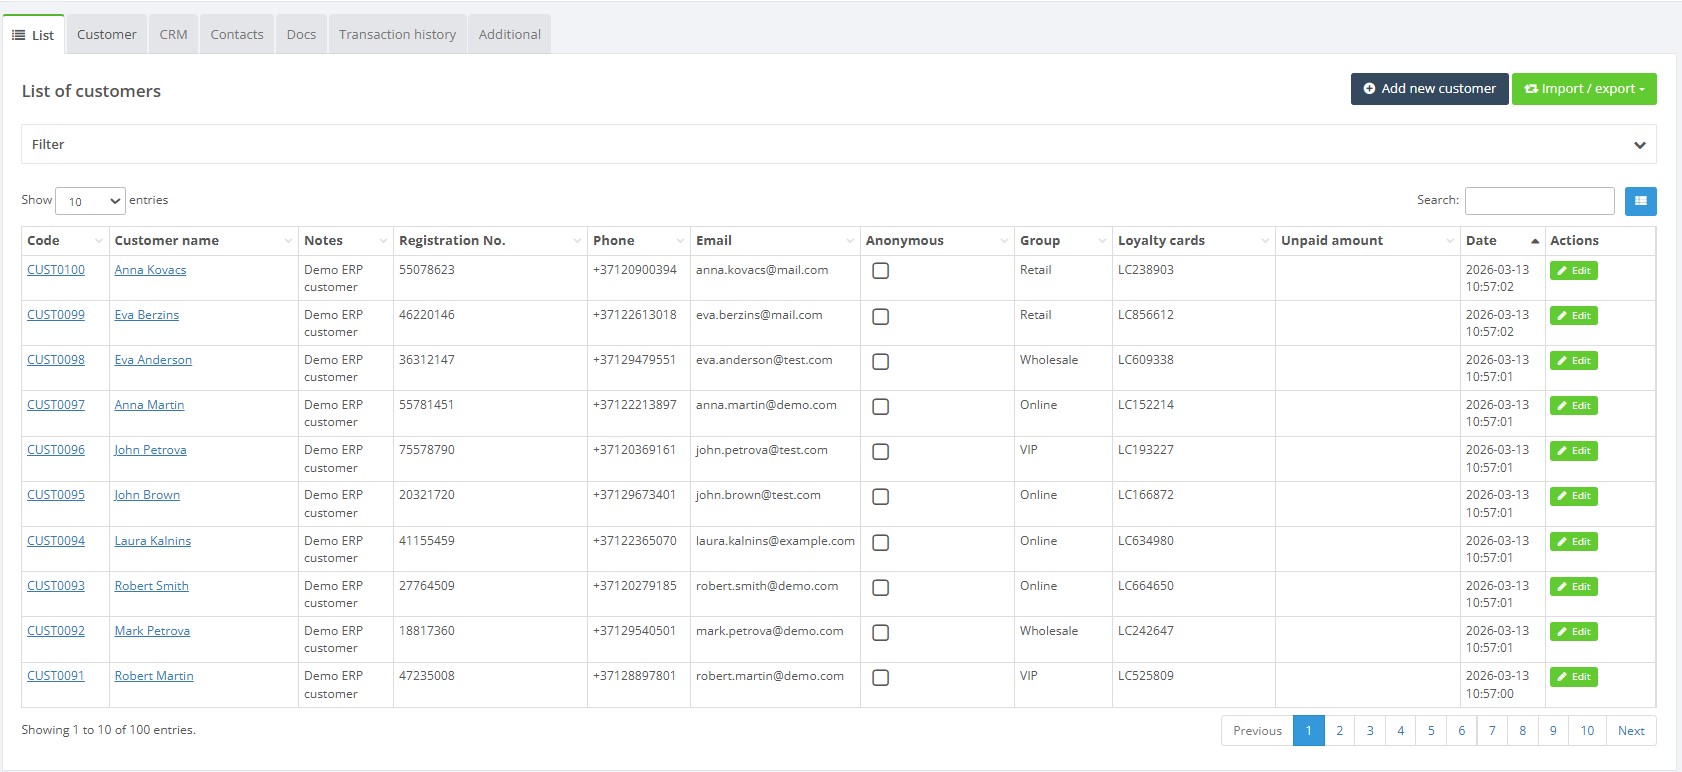
The list page shows customers with columns for code, name, notes, registration number, phone, email, anonymous flag, group and loyalty cards. You can search or filter the list, configure visible columns and use the Add new customer and Import / export buttons to manage data.
Step‑by‑step procedure
- View the list – Open Customers → Customers. Use search and filter fields to find a specific customer. The import/export drop‑down lets you download a template or upload customer data.
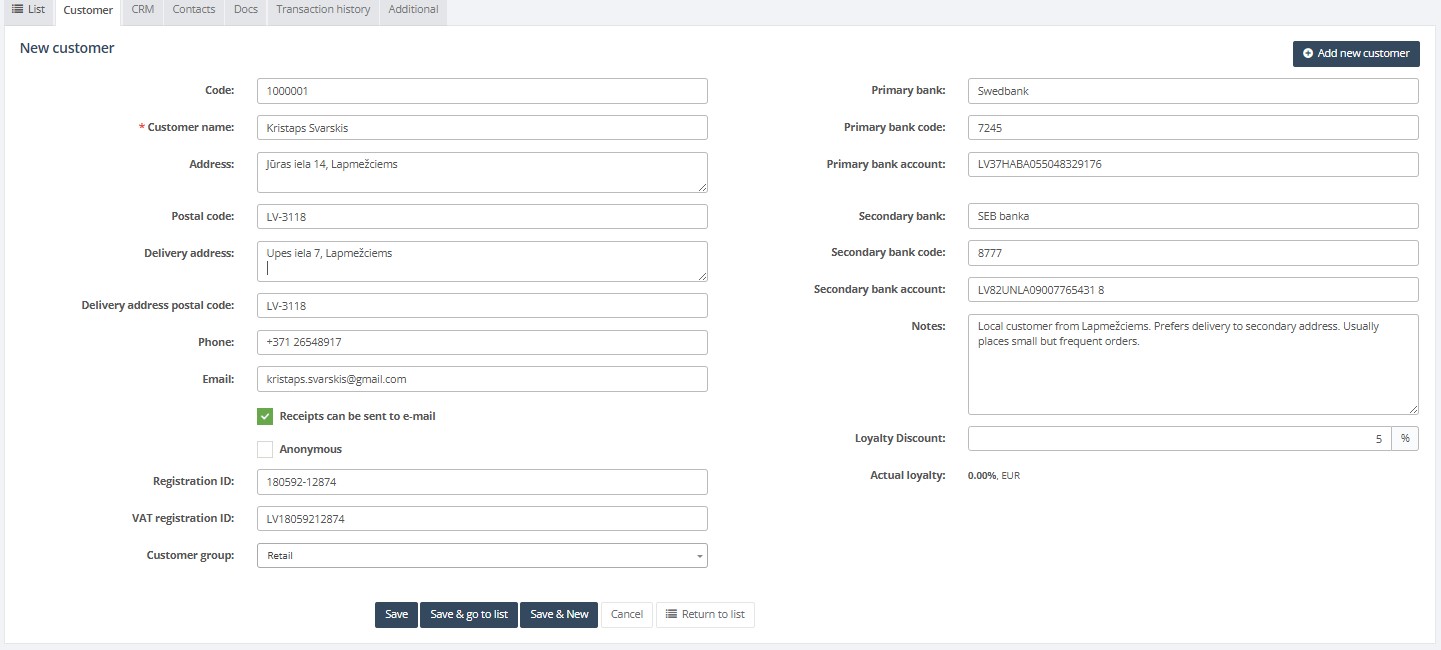
- Create a new customer – Click Add new customer. The Customer tab opens with a blank form. Complete the mandatory fields marked with an asterisk (*):
- Customer name* – the name used on invoices and offers.
- Address, Postal code, Delivery address and Delivery postal code.
- Phone and Email – primary contact details.
- Anonymous – if ticked, customer details are not stored; used for cash sales.
- Customer group – classification for reporting and price lists.
- Receipts can be sent to email – tick to automatically email receipts.
- Enter additional attributes or notes as required. Custom attributes defined in settings appear below the main fields.
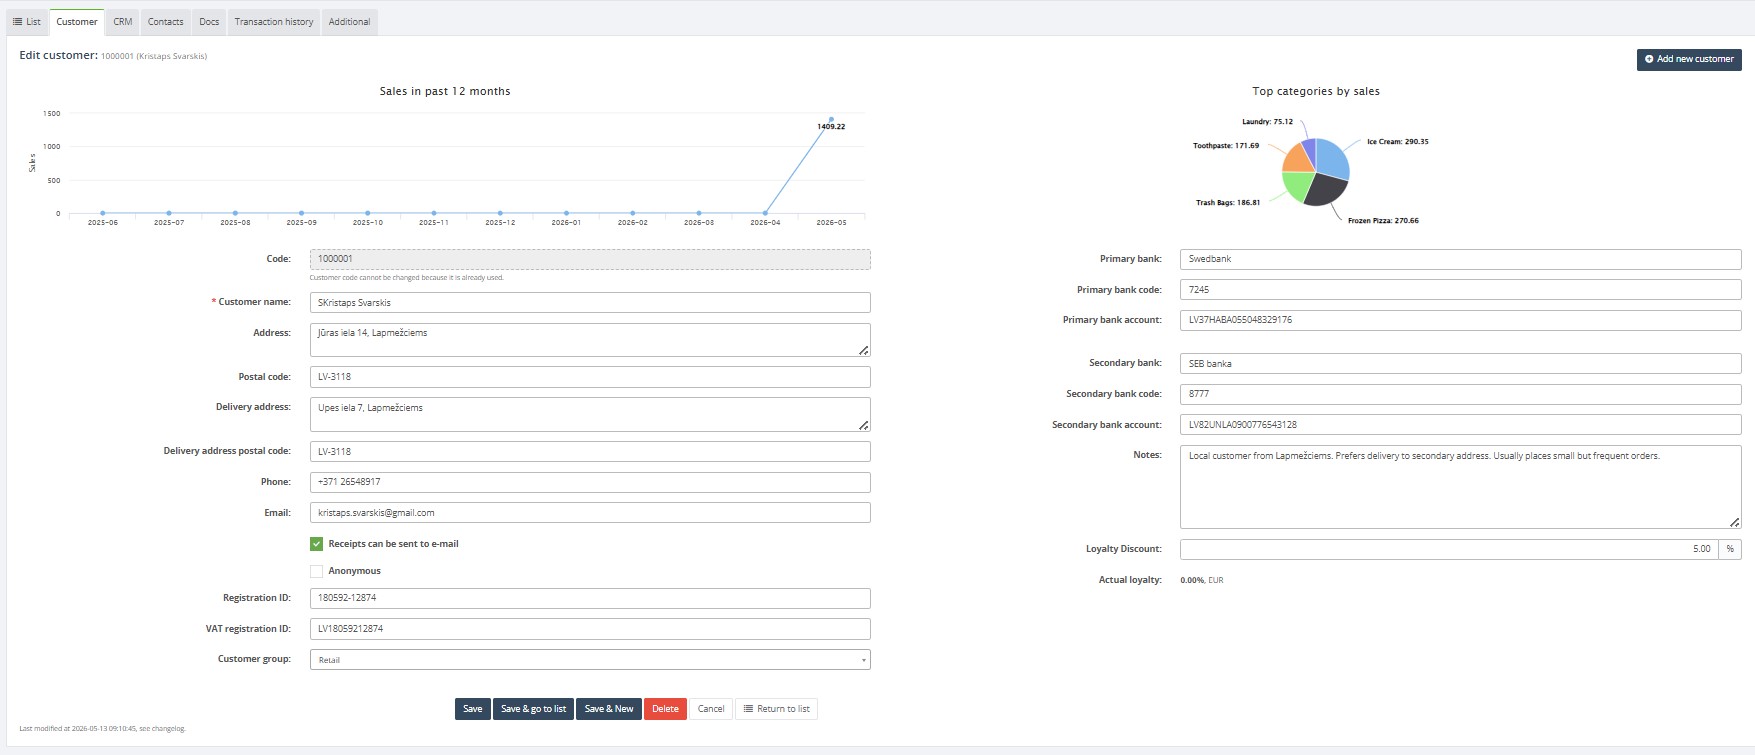
- Edit customer details – Double‑click a row on the list. The customer card opens. The top of the Customer tab displays sales statistics and graphs for the last 12 months and top categories by sales. You can update address, contact details, anonymous status, group and custom attributes. Click Save when finished.
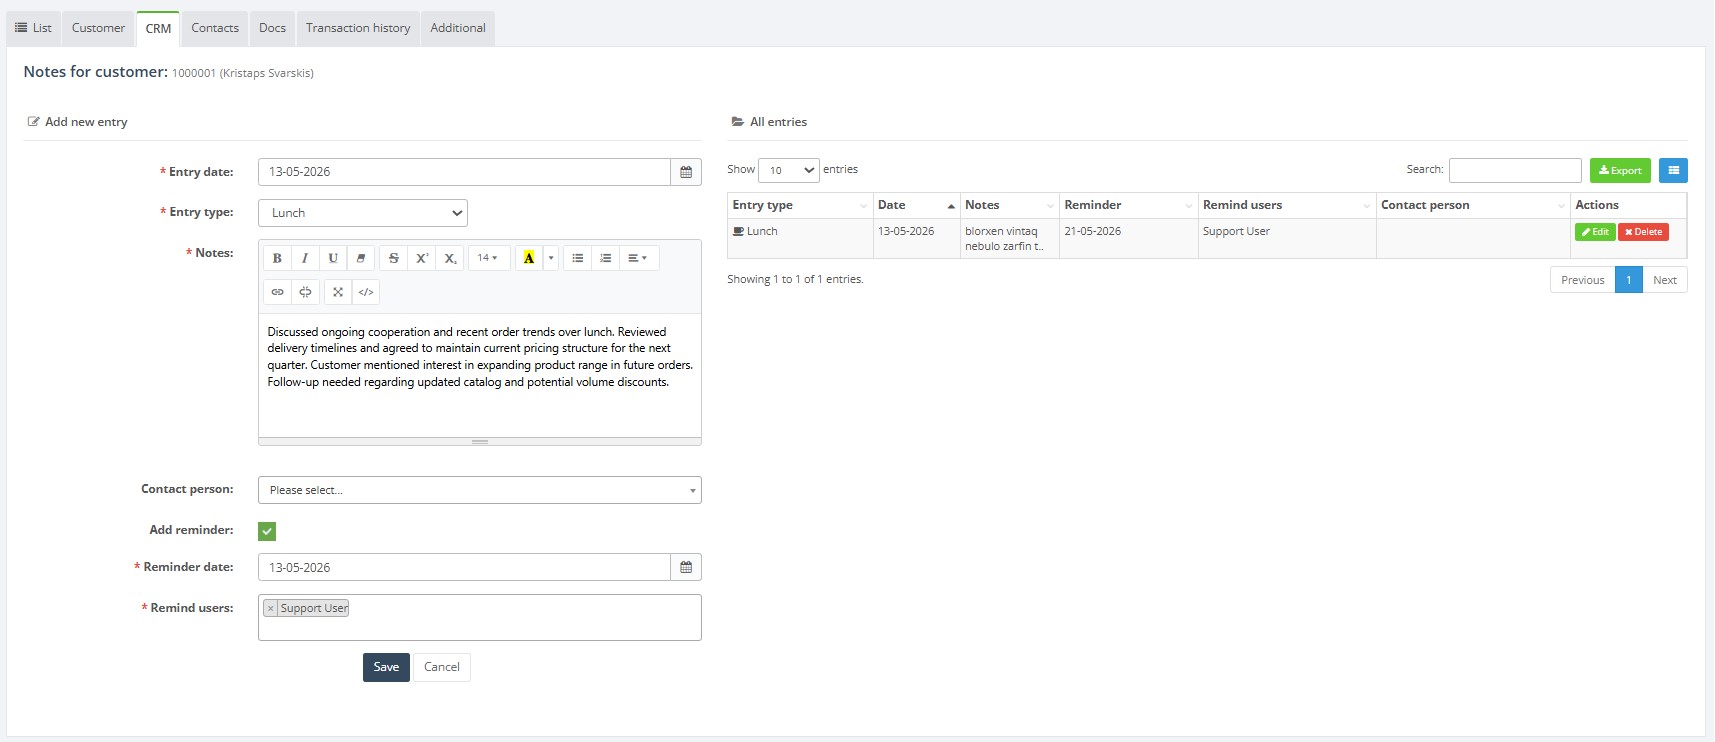
- Record CRM activities – Select the CRM tab to log phone calls, meetings or notes. Fill in Entry date, choose an Entry type, write Notes, select a Contact person and optionally add a Reminder. Click Add to save the entry. Existing entries appear below with columns for entry type, date, notes, reminder, reminded users and contact person.
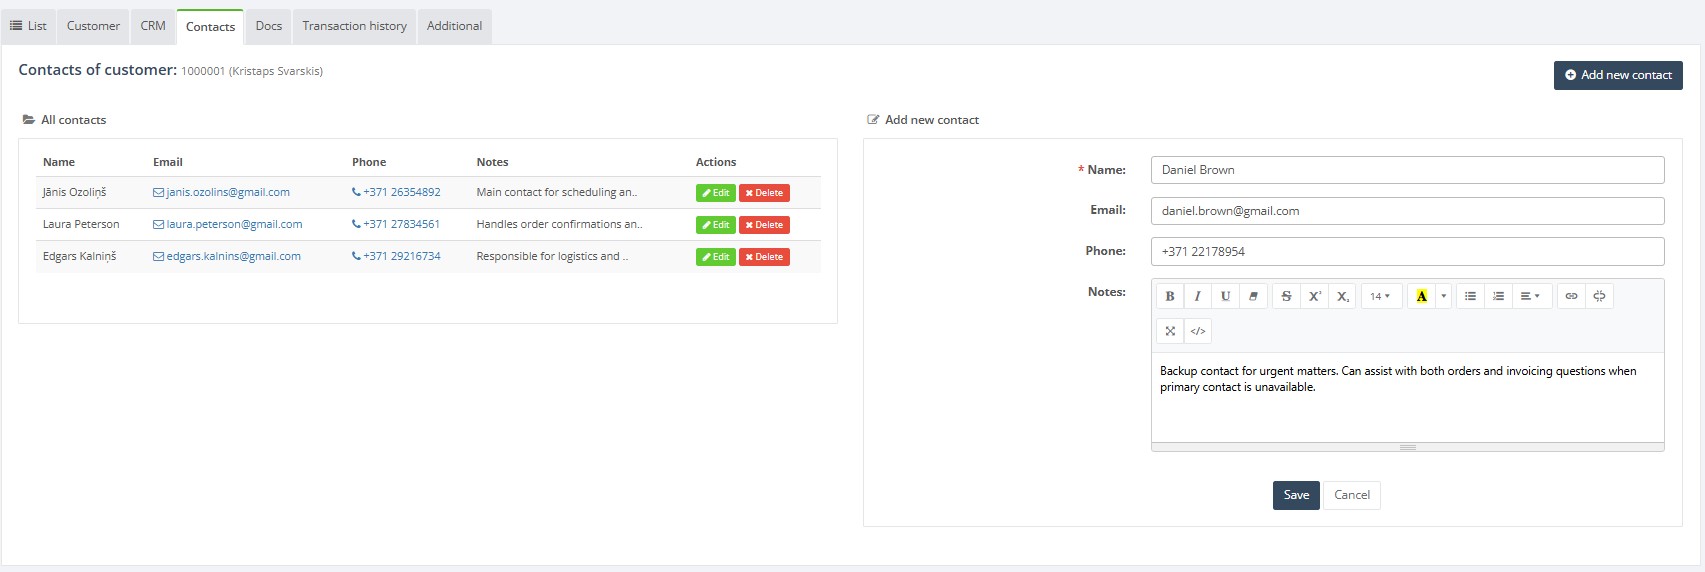
- Manage contacts – On the Contacts tab click Add new contact to open a form. Enter the contact’s Name*, Email, Phone and Notes (rich text). Press Save to add the contact or Cancel to close without saving.
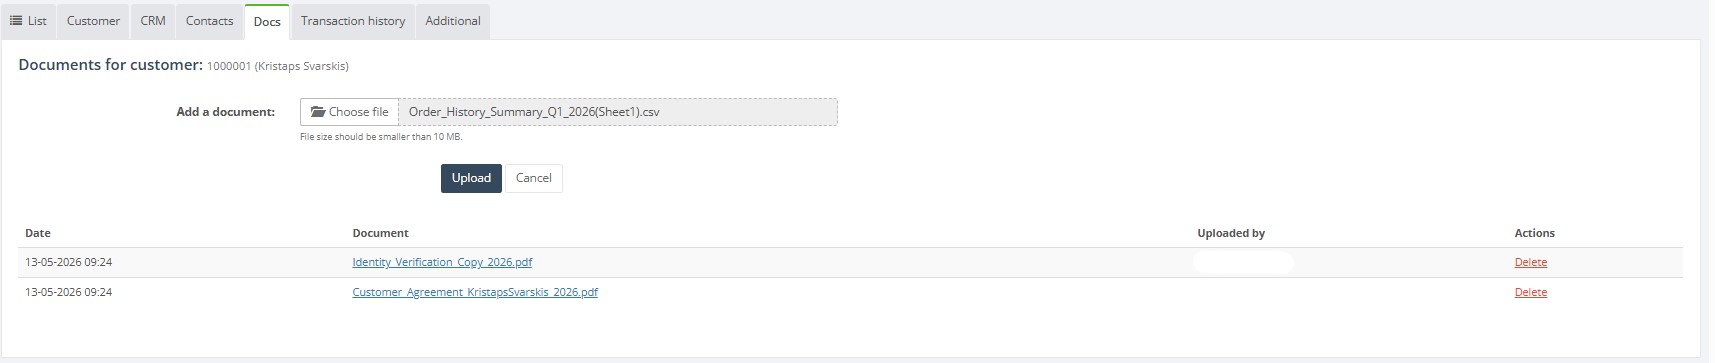
- Upload documents – Navigate to the Docs tab. Click Choose file to select a document (maximum 10 MB) and then Upload. Use Cancel to abort. Uploaded files are stored on the customer card.
- Review transaction history – The Transaction history tab shows all invoices and related documents for the customer. You can change the Show entries drop‑down to display more rows, set a date range filter and search within the table. Columns include document number, lines, total amount, location and creation date.

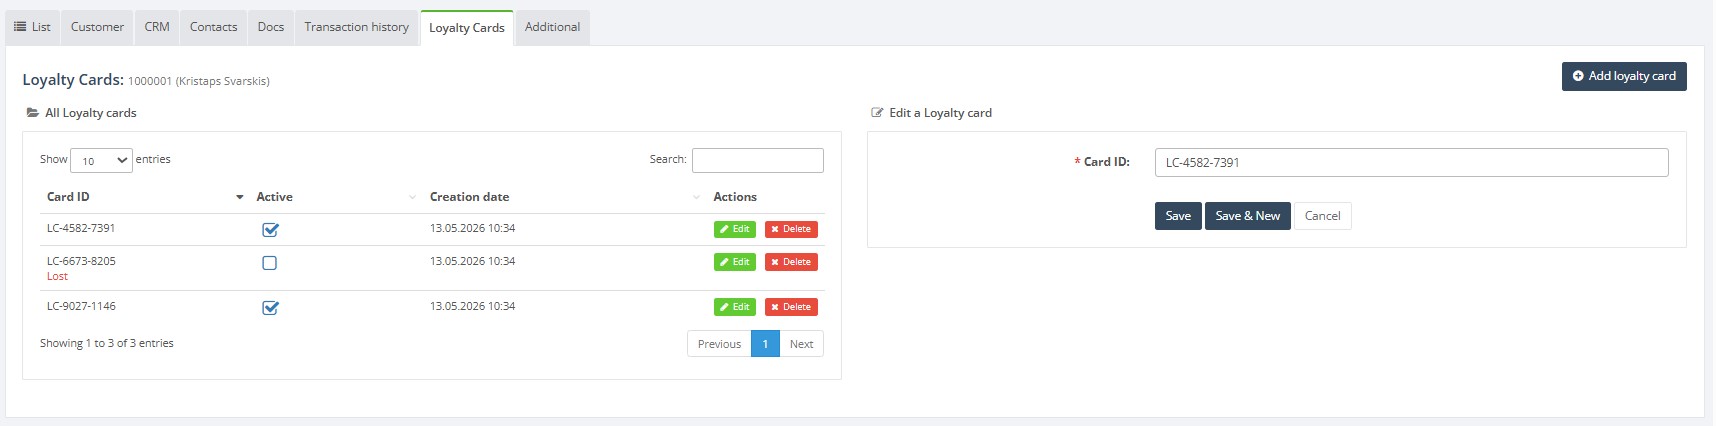
- Manage loyalty cards – On the Loyalty cards tab you can issue new cards or view existing ones. Enter the Card ID in the form and click Add to assign it to the customer. Existing cards are listed below (if any).
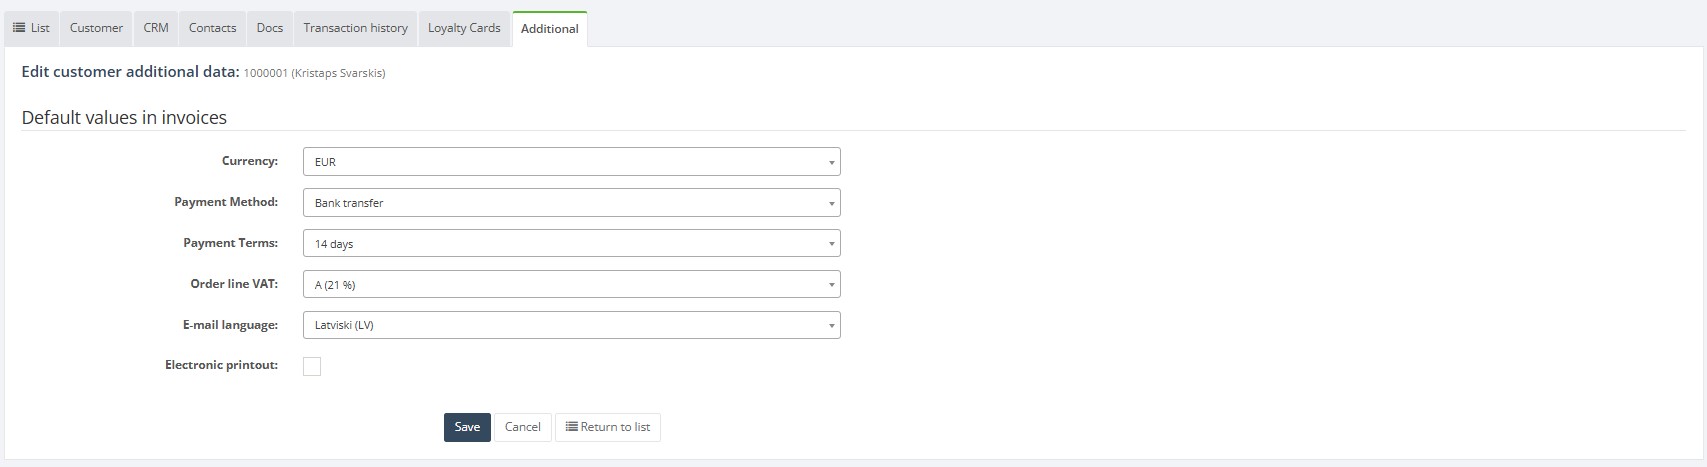
- Set default invoice values – The Additional tab lets you define default settings for sales documents: Currency, Payment method, Payment terms, Order line VAT, E‑mail language and whether to enable Electronic printout. After adjusting these defaults click Save.
- Import or export customers – Back on the list page, use the Import / export drop‑down to download a template or upload customer data. Ensure mandatory columns such as Name, Group and Anonymous flag are completed. Duplicate codes or names will be rejected.

Required fields
The following fields are mandatory when creating or updating a customer:
- Customer name* – required for every customer record.
- Customer group – if groups are configured, one must be selected.
- Delivery address – needed when sending goods to the customer.
- Name on the Contacts tab when adding contact persons.
- Entry date and Entry type on the CRM tab when adding notes.
- Card ID when creating a new loyalty card.
Validation rules
- Unique customer code – automatically generated or manually entered codes must be unique.
- Mandatory fields cannot be empty; the system highlights missing values in red.
- Email must follow a valid format; invalid addresses will be rejected.
- Phone numbers accept only digits and plus signs.
- File size limit – documents larger than 10 MB cannot be uploaded.
- Date fields such as Entry date and Delivery date must be valid calendar dates.
Exceptions
- Customers with existing invoices or offers cannot be deleted; instead set them inactive.
- If the anonymous flag is checked, personal data fields are hidden and cannot be edited.
- Default invoice values on the Additional tab apply only to new documents and do not retroactively change existing invoices.
Common errors
- Saving a customer without a name or mandatory fields results in validation errors.
- Duplicate customer codes or names cause import failures; check the import file for duplicates.
- Uploading a file larger than the allowed size triggers an error; reduce file size or split it.
- Invalid email or phone number formats are rejected; correct the value before saving.
Troubleshooting
- If a customer cannot be found when creating documents, ensure it is not filtered out by status or search terms.
- When import errors occur, verify that column headers match the template and that required fields are populated.
- If CRM notes or contacts are not saving, confirm that all mandatory fields (date, entry type, name) are filled.
- To update loyalty card information, remove the existing card and reassign a new card ID; there is no edit option for the card number.
- For default invoice settings that do not apply, check whether the document uses a different currency or payment method at document level.