Purpose
The Vendors module stores information about your suppliers. It acts as a master data register for vendor names, addresses and contact details and also lets you record CRM notes, attach documents and review purchase history. Keeping vendor records up‑to‑date ensures that purchase orders can be raised quickly and that payments are made to the correct bank accounts. It also supports due diligence by maintaining all relevant documents in one place.
Roles involved
Depending on your organisation, the following roles typically interact with vendor records:
- Procurement managers/buyers – create and maintain supplier master data, update delivery times and notes.
- Accounts payable clerks – verify bank details, registration information and reconcile vendor invoices.
- Warehouse managers – consult vendor details to plan receiving schedules and update lead times.
- CRM or relationship managers – log communications and reminders in the CRM tab.
- Users must have appropriate permissions such as “view Vendors”, “create Vendors”, “edit Vendors” and “delete Vendors”. Without edit rights the record is read‑only.
- Only administrators can change vendor numbering sequences or delete vendors with existing transactions.
Preconditions
- Vendor groups and numbering sequences should be set up in Settings if automatic vendor codes are used.
- Banks and locations should be defined so that bank accounts and delivery addresses can be selected.
- Users creating vendors must have a basic understanding of the company’s procurement policies and required documentation.
Navigation path
From the main menu navigate to:
Vendors
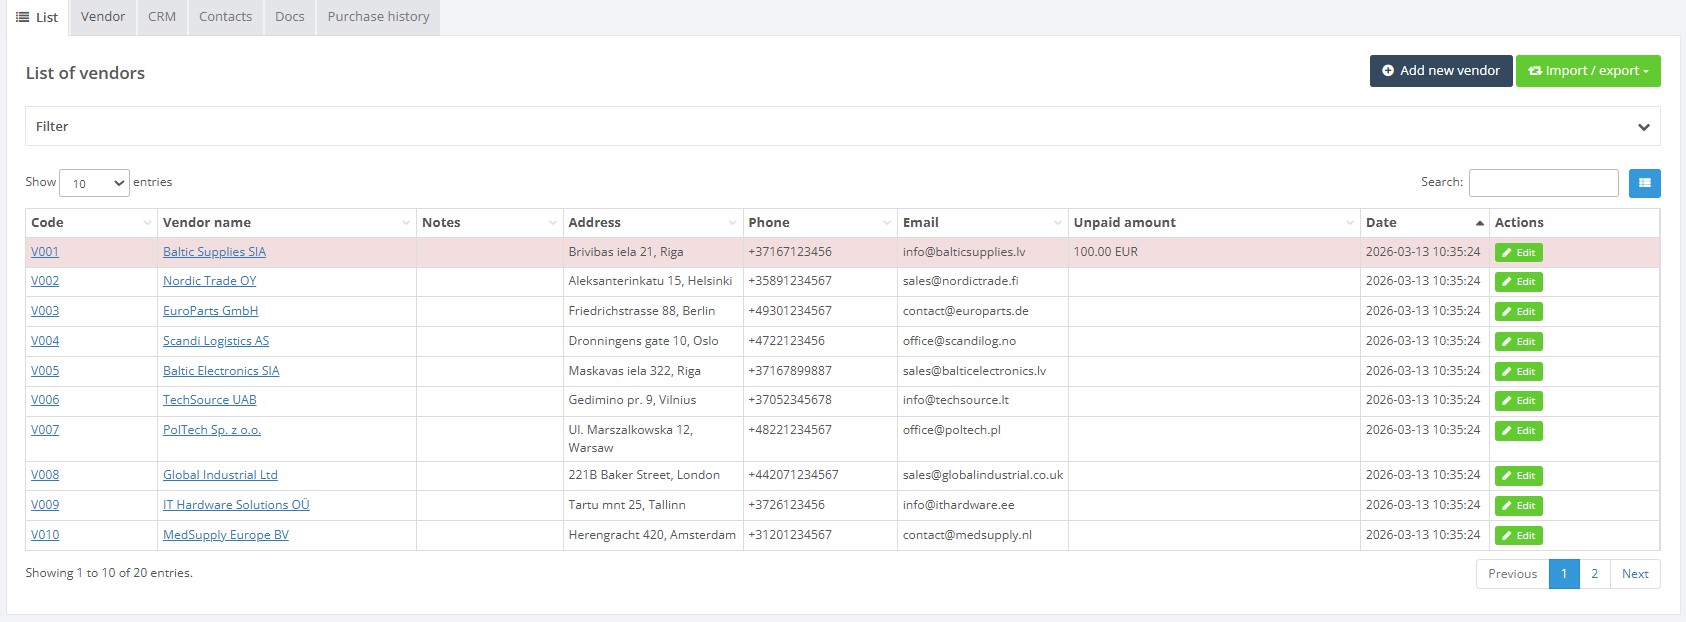
The list page displays all vendors with columns for code, name, notes, address, contact details, unpaid amount and date. Search and filter fields are available to quickly locate a vendor, there are buttons for Add new vendor and Import / export to bulk import or export vendor data.
Step‑by‑step procedure
- Open the vendor list – Navigate to Vendors → Vendors. Use the search field or filter drop‑downs to narrow results. Adjust displayed columns via the column picker if necessary.
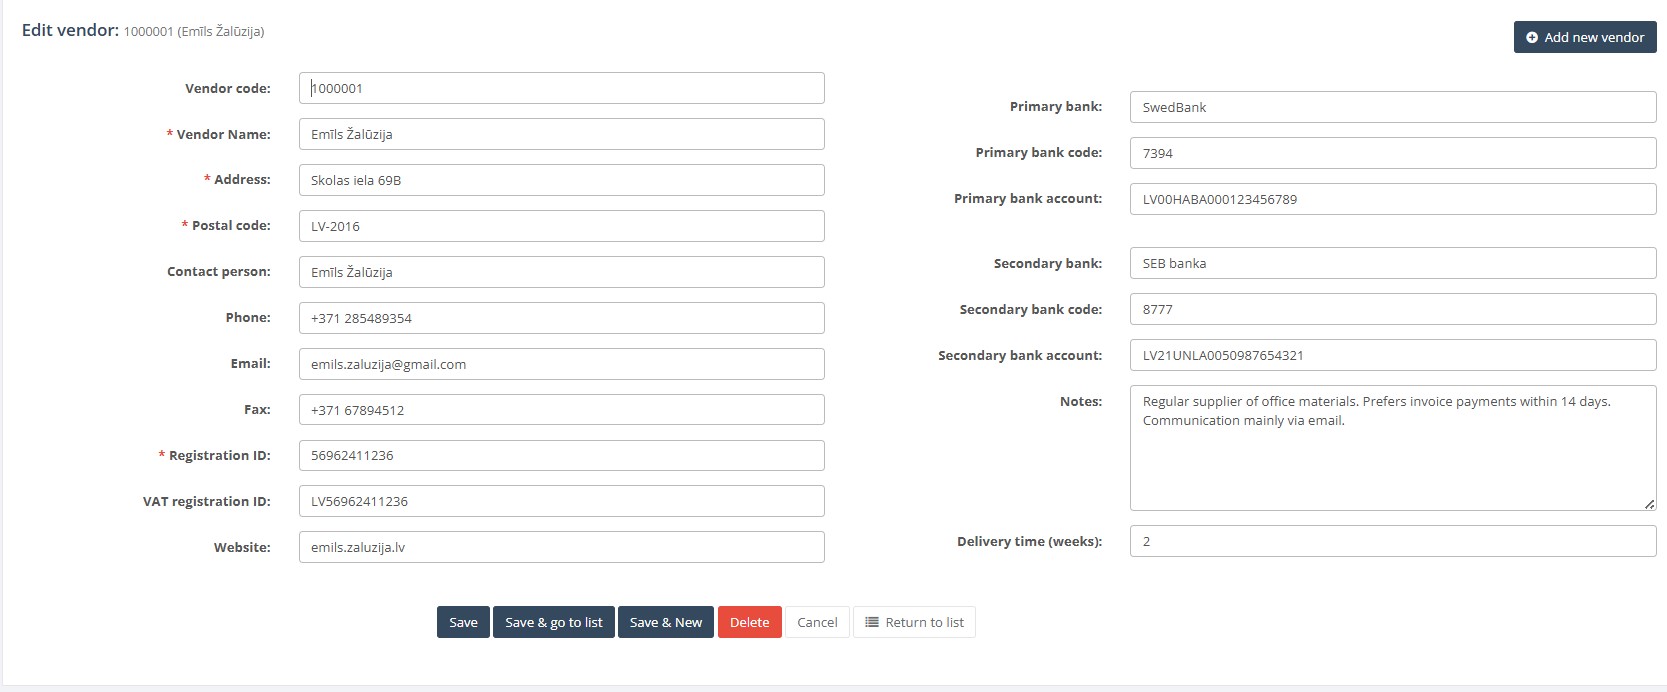
- Create a new vendor – Click Add new vendor. The Vendor tab opens with an empty form. Fill in mandatory fields marked with an asterisk (*):
- Vendor name* – the legal name of the supplier.
- Address – street and house number.
- Postal code, City and Country.
- Registration ID and VAT registration ID – if applicable.
- Primary bank – select a predefined bank and enter the vendor’s account number for payments.
- Phone, email and website – contact details of the vendor.
- Delivery time (weeks) – expected lead time to receive goods.
- Use the Notes field for internal remarks or negotiated terms.
- Edit an existing vendor – Double‑click a row in the list. The vendor card opens. Modify the necessary fields and click Save or Return to list.
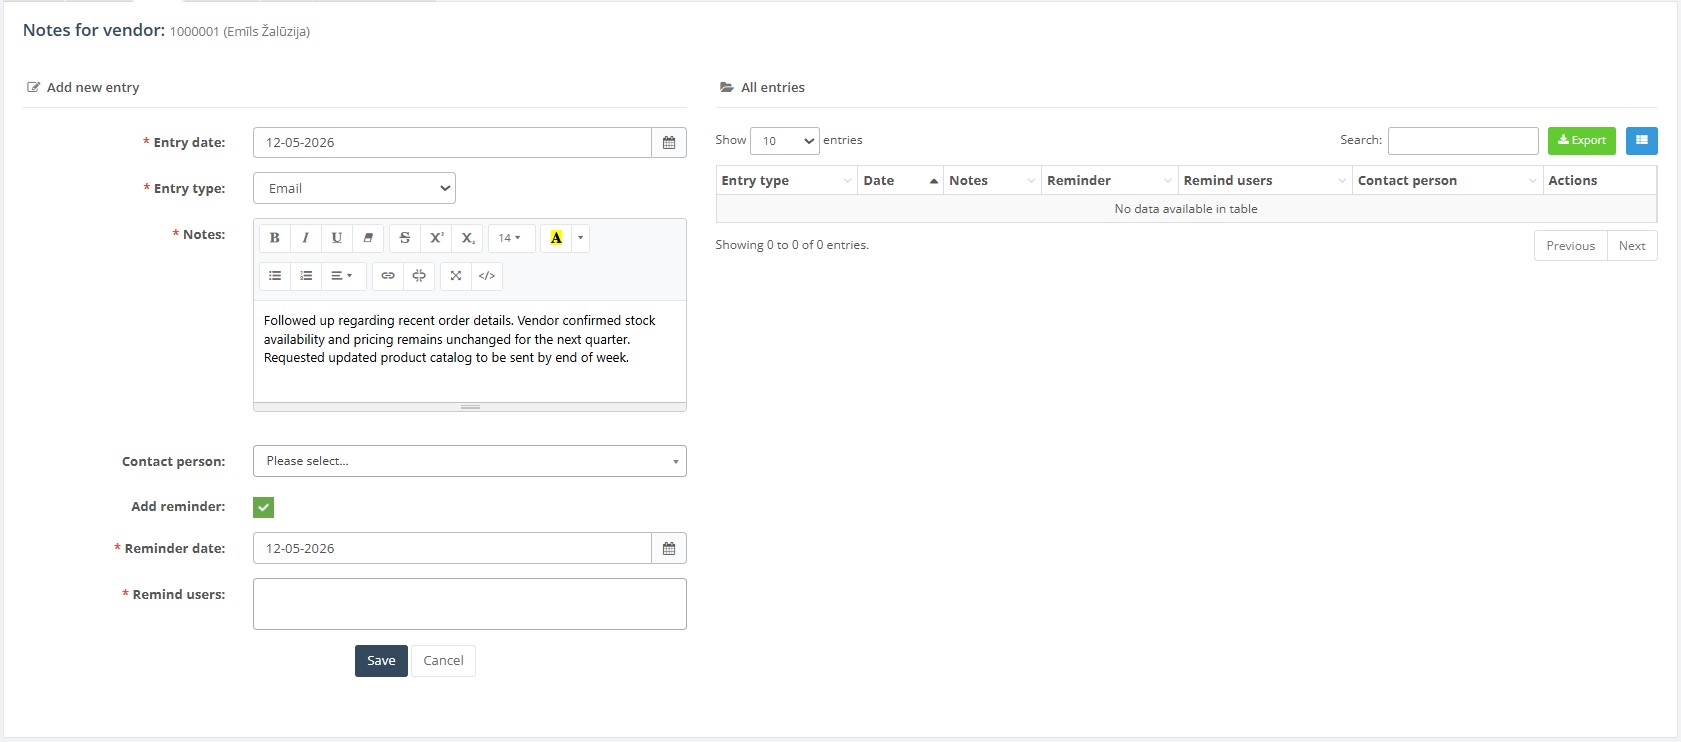
- Use CRM tab – On the vendor card select the CRM tab to record interactions. Fill the entry form with Entry date, Entry type, Notes, Contact person and optionally set a reminder date. Click Add to log the entry. Existing entries appear in a table with columns for entry type, date, notes, reminder, remind users and contact person.
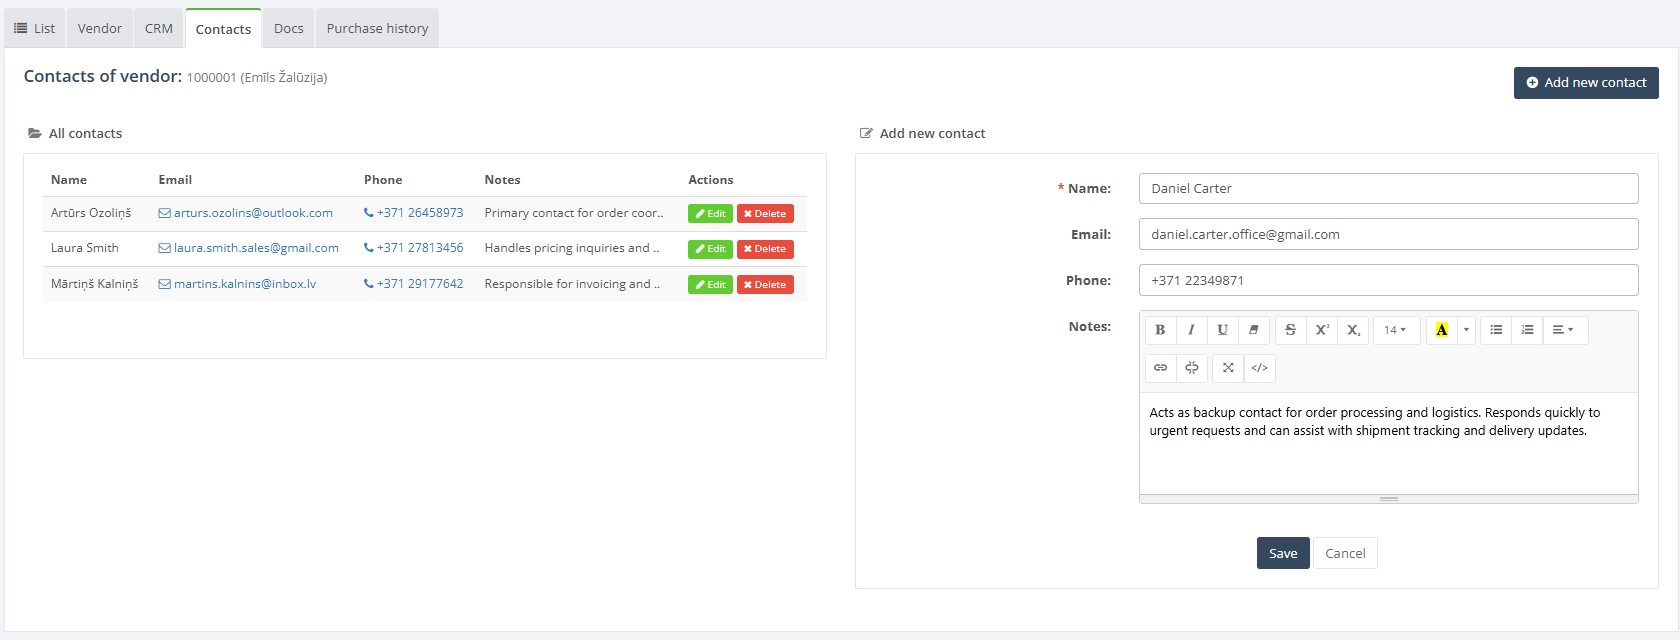
- Manage contacts – Switch to the Contacts tab to store individual contacts at the vendor. Click Add new contact and fill in Name*, Email, Phone and Notes (rich text). Press Save to add the contact or Cancel to discard.
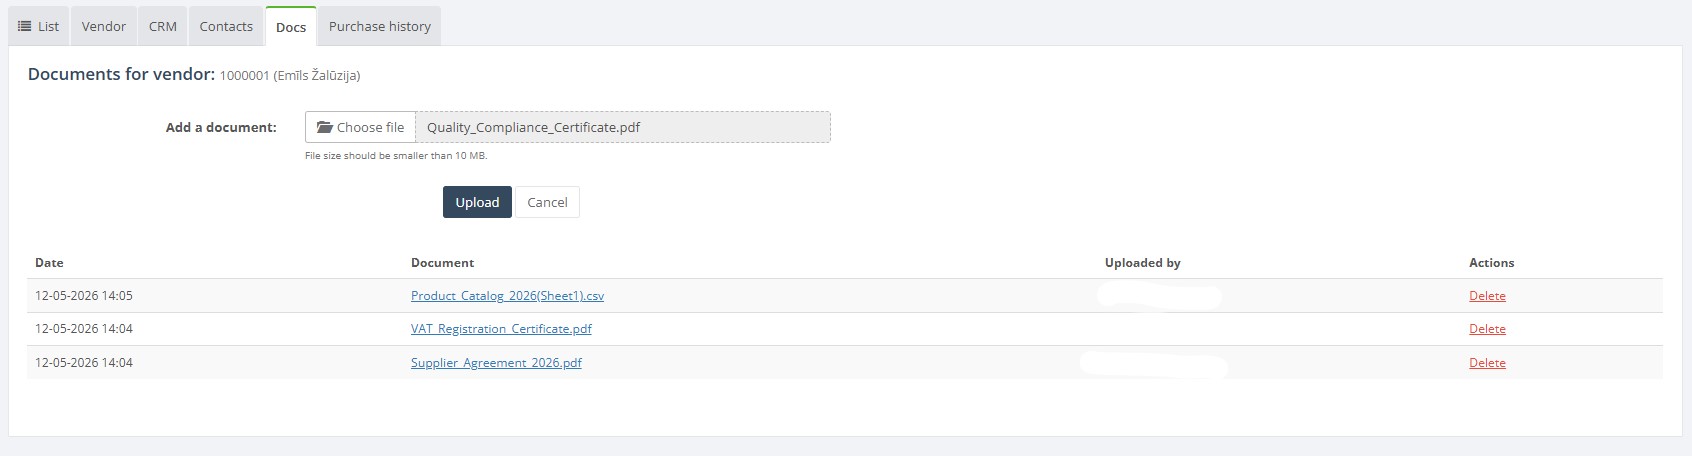
- Attach documents – In the Docs tab you can upload files such as contracts or certificates. Click Choose file to select a file (max size 10 MB), then press Upload. Use Cancel to abort,uploaded documents are stored against the vendor and can be downloaded later.
- View purchase history – The Purchase history tab lists all purchase orders and credit notes associated with the vendor. Columns include PO number, creation date, approve date, number of lines, total amount (with and without VAT), currency and location, if no orders exist, the table will be empty.

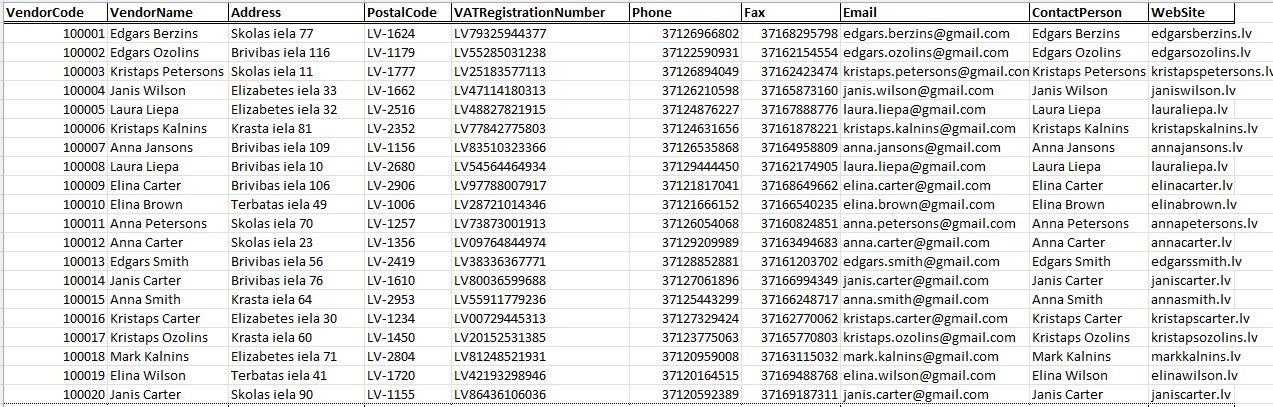
- Import or export vendors – Back on the list page, use the Import / export drop‑down to download a template or upload vendor data. Follow the column headers precisely; mandatory columns cannot be blank. The import checks for duplicate codes and names.
Required fields
Mandatory fields depend on your configuration but generally include:
- Vendor name – cannot be blank.
- Registration ID – required if the supplier is a legal entity.
- Primary bank details – required if paying by bank transfer.
- Name on the Contacts tab when adding a contact.
- Entry date and Entry type on the CRM tab when logging a note.
Validation rules
- Vendor code uniqueness – the system automatically assigns a code if configured; manually entered codes must be unique.
- Mandatory fields must be filled before saving; otherwise the system highlights them in red.
- Bank account numbers are validated for length; only numeric characters are accepted.
- File size limit – documents larger than 10 MB cannot be uploaded.
- Date fields such as Entry date and Approve date must be valid calendar dates.
Exceptions
- A vendor cannot be deleted if purchase orders or invoices reference it. Instead mark it as inactive or rename it.
- If a vendor is shared across branches, editing rights may be restricted to certain user roles.
Common errors
- Attempting to save a vendor without a name or mandatory fields will result in validation errors.
- Duplicate vendor codes or names cause import failures; ensure each supplier has a unique identifier.
- Uploading a file larger than the allowed size will show an error message; compress or split the document.
- Bank account numbers containing letters or special characters are rejected; use only digits.
Troubleshooting
- If a vendor is missing from selection lists, verify it is not filtered out by active status or search terms.
- For import errors, open the downloaded template and compare column names. Ensure there are no hidden characters or blank required fields.
- If CRM entries or contacts are not saving, check that all mandatory fields (date, entry type, name) are filled.
- To correct bank details, edit the vendor record and update the bank fields; changes apply to future orders only.